Run Kali Linux Apps in Windows 10 & Windows 11
Overview
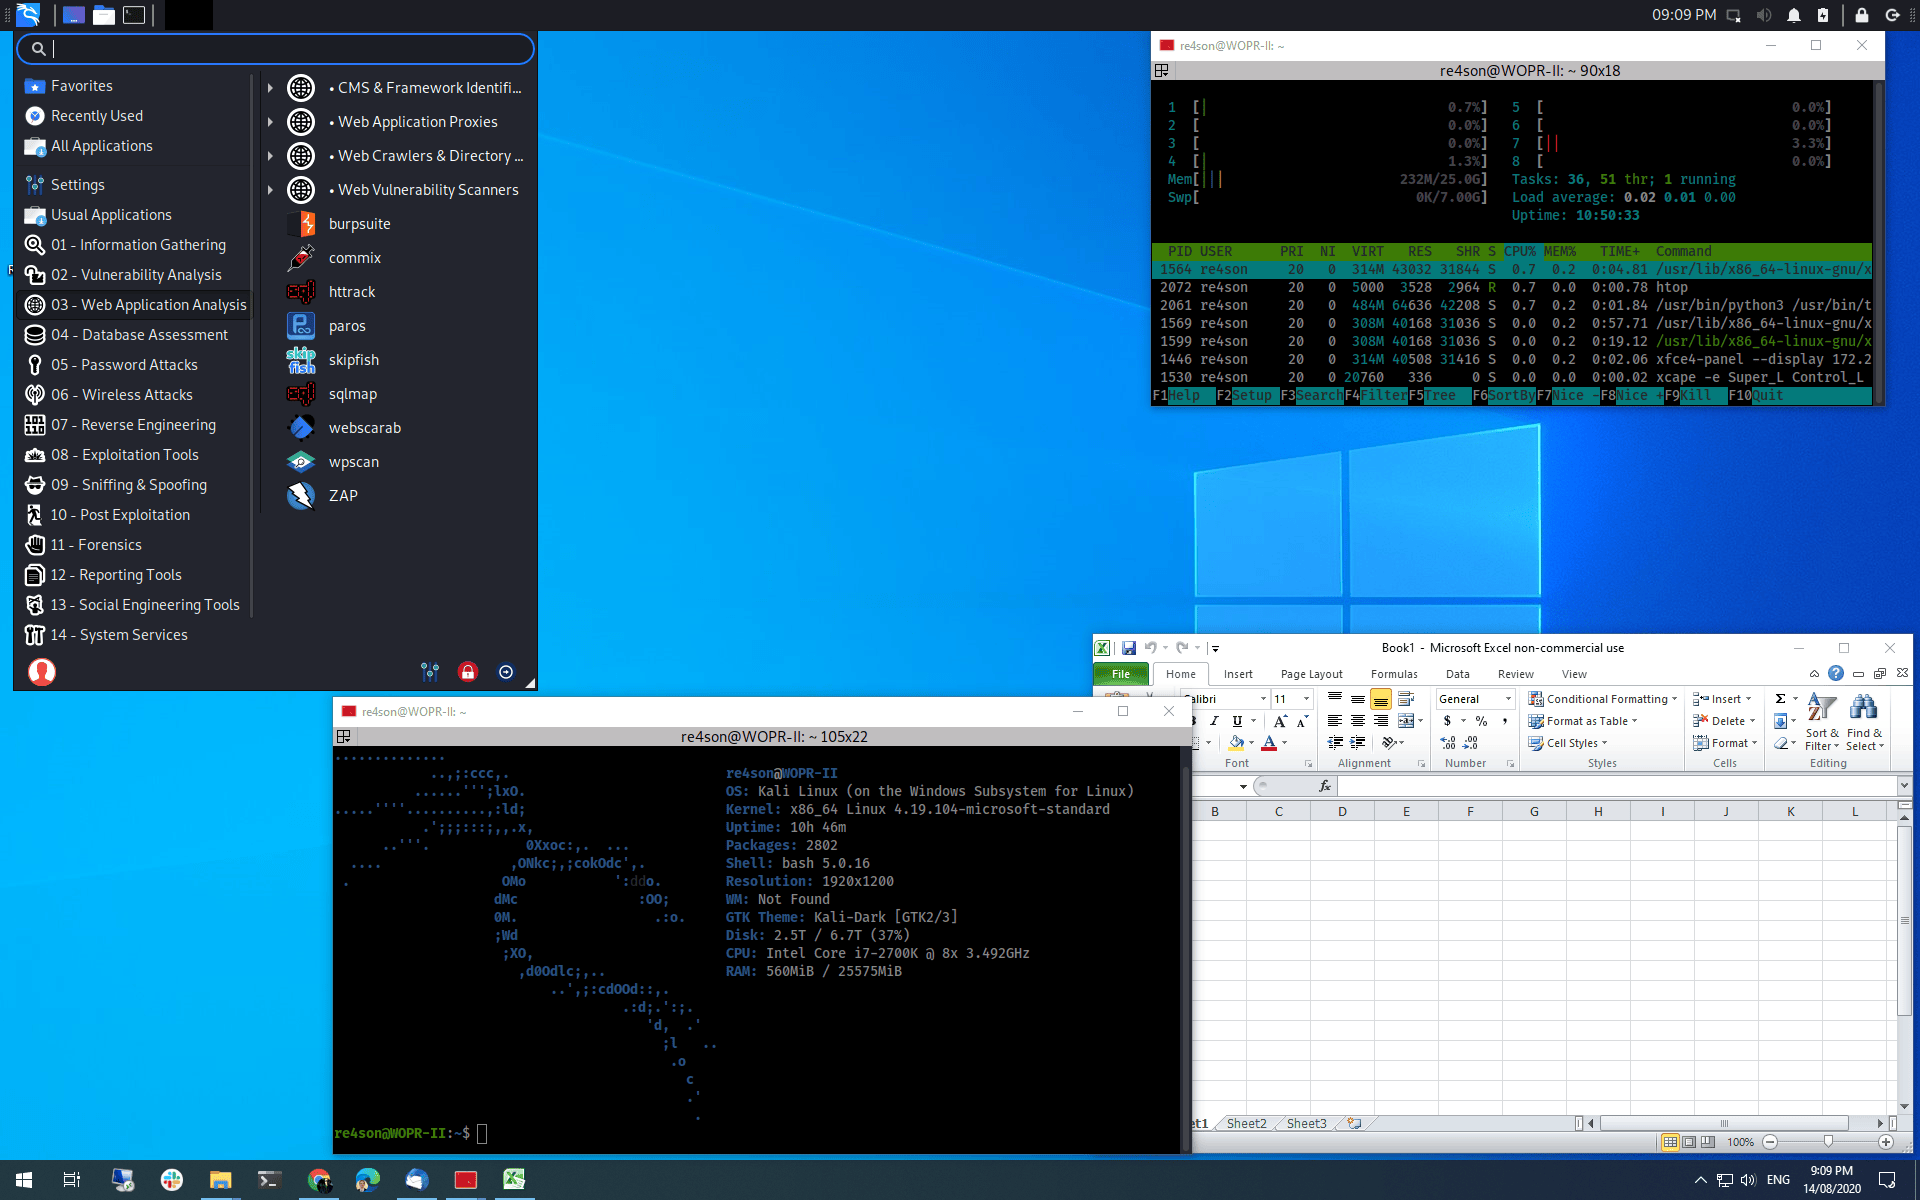
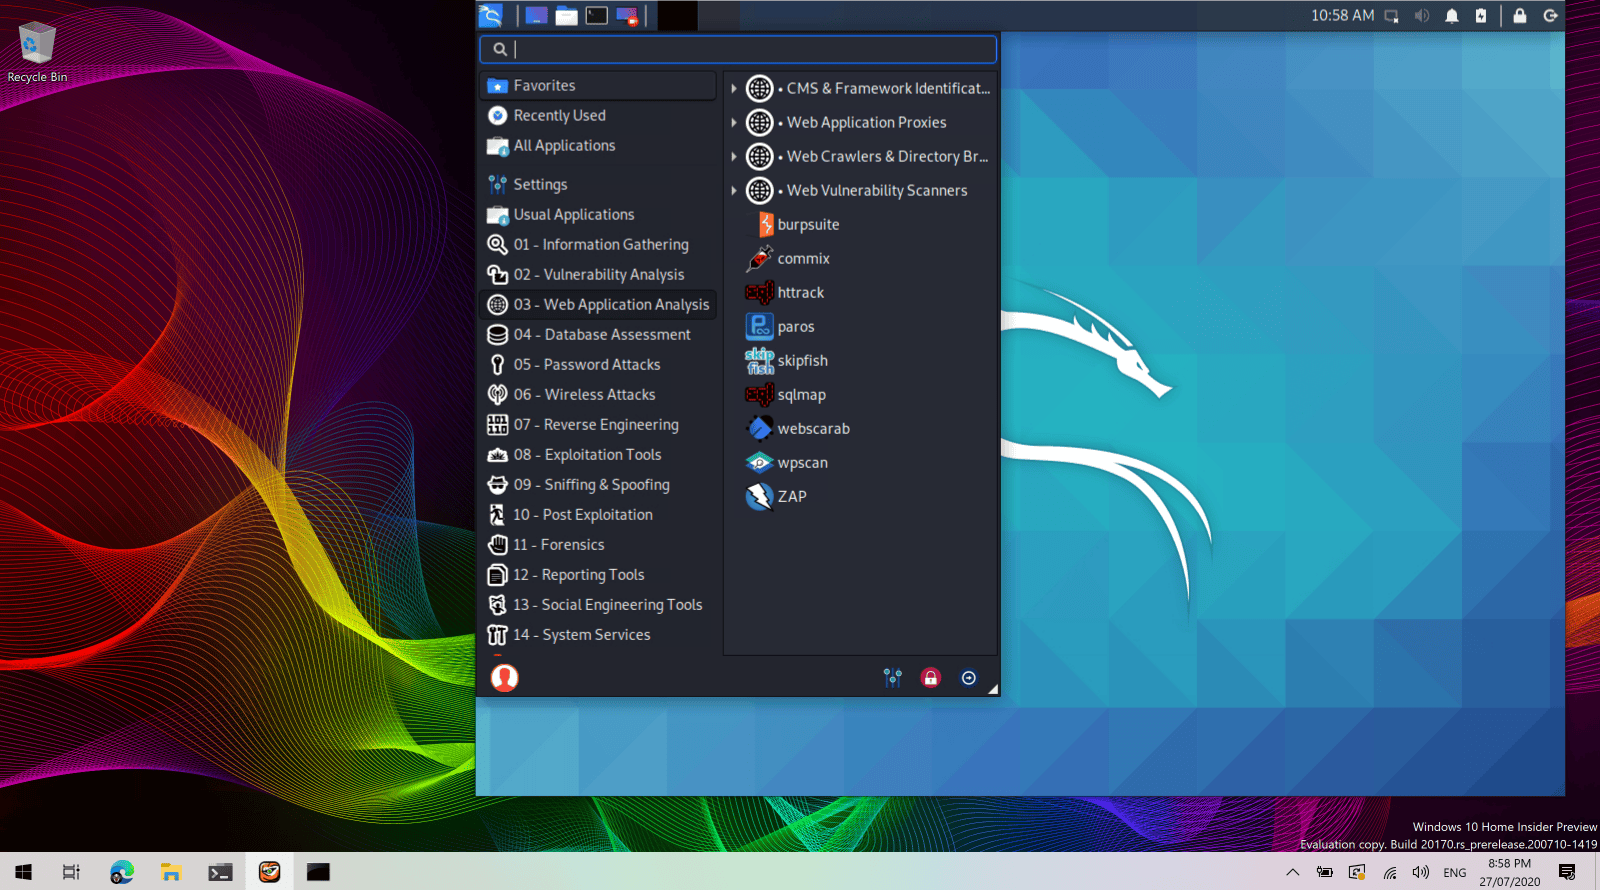
Win-KeX provides a Kali Desktop Experience for Windows Subsystem for Linux (WSL 2) with the following features:
- Window mode: start a Kali Linux desktop in a dedicated window
- Seamless mode: share the Windows desktop between Windows and Kali apps and menus
- Sound support
- Unprivileged and Root session support
- Shared clipboard for cut and paste support between Kali Linux and Windows apps
- Multi-session support: root window & non-priv window & seamless sessions concurrently
- Fully compatible with WSLg
This page details the steps to install Win-Kex in under 2 minutes.
Installation
All installation steps, up to the point where we install Win-Kex, are also explained in the 5 minute video guide by the amazing NetworkChuck:
New Kali Linux GUI on Windows 10 (WSL 2) // 2020.3 Release
Prerequisites
- Running Windows 10 version 2004 or higher
- Using Windows Terminal
Install Kali Linux in WSL2
- Open PowerShell as administrator and run:
Enable-WindowsOptionalFeature -Online -FeatureName Microsoft-Windows-Subsystem-Linux
Restart
Open PowerShell as administrator and run:
dism.exe /online /enable-feature /featurename:VirtualMachinePlatform /all /norestart
dism.exe /online /enable-feature /featurename:Microsoft-Windows-Subsystem-Linux /all /norestart
Restart
Download and install the WSL2 Linux Kernel from here: https://aka.ms/wsl2kernel
Open PowerShell as administrator and run:
wsl --set-default-version 2Install Kali Linux from the Microsoft Store
Note: to upgrade an existing WSL1 kali-linux installation, type:
wsl --set-version kali-linux 2Run Kali and finish the initial setup
Install Win-KeX
- Install win-kex via:
kali@kali:~$ sudo apt update
kali@kali:~$
kali@kali:~$ sudo apt install -y kali-win-kex
Run Win-KeX
Win-KeX supports three modes:
Window Mode:

To start Win-KeX in Window mode with sound support, run
kex --win -sRefer to the Win-KeX Win usage documentation for further information.
Enhanced Session Mode:

To start Win-KeX in Enhanced Session Mode with sound support and arm workaround, run
kex --esm --ip -sRefer to the Win-KeX ESM usage documentation for further information.
Seamless mode:
To start Win-KeX in Seamless mode with sound support, run
kex --sl -sRefer to the Win-KeX SL usage documentation for further information.
Optional Steps:
- If you have the space, why not install “Kali with the lot”?:
sudo apt install -y kali-linux-large

- Create a Windows Terminal Shortcut:
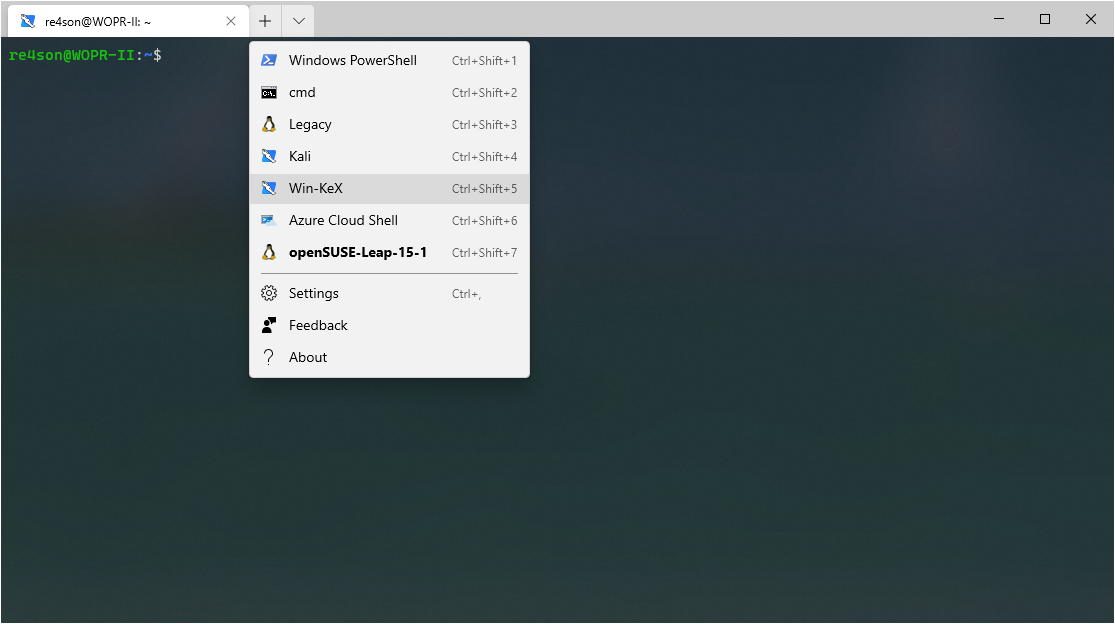
Choose amongst these options:
Basic Win-KeX in window mode with sound:
{
      "guid": "{55ca431a-3a87-5fb3-83cd-11ececc031d2}",
      "hidden": false,
      "name": "Win-KeX",
      "commandline": "wsl -d kali-linux kex --wtstart -s",
},
Advanced Win-KeX in window mode with sound - Kali icon and start in kali home directory:
Copy the kali-menu.png icon across to your windows picture directory and add the icon and start directory to your WT config:
{
        "guid": "{55ca431a-3a87-5fb3-83cd-11ececc031d2}",
        "hidden": false,
        "icon": "file:///c:/users/<windows user>/pictures/icons/kali-menu.png",
        "name": "Win-KeX",
        "commandline": "wsl -d kali-linux kex --wtstart -s",
        "startingDirectory" : "//wsl$/kali-linux/home/<kali user>"
},
Basic Win-KeX in seamless mode with sound:
{
      "guid": "{55ca431a-3a87-5fb3-83cd-11ececc031d2}",
      "hidden": false,
      "name": "Win-KeX",
      "commandline": "wsl -d kali-linux kex --sl --wtstart -s",
},
Advanced Win-KeX in seamless mode with sound - Kali icon and start in kali home directory:
Copy the kali-menu.png icon across to your windows picture directory and add the icon and start directory to your WT config:
{
        "guid": "{55ca431a-3a87-5fb3-83cd-11ececc031d2}",
        "hidden": false,
        "icon": "file:///c:/users/<windows user>/pictures/icons/kali-menu.png",
        "name": "Win-KeX",
        "commandline": "wsl -d kali-linux kex --sl --wtstart -s",
        "startingDirectory" : "//wsl$/kali-linux/home/<kali user>"
},
Basic Win-KeX in ESM mode with sound:
{
      "guid": "{55ca431a-3a87-5fb3-83cd-11ecedc031d2}",
      "hidden": false,
      "name": "Win-KeX",
      "commandline": "wsl -d kali-linux kex --esm --wtstart -s",
},
Advanced Win-KeX in ESM mode with sound - Kali icon and start in kali home directory:
Copy the kali-menu.png icon across to your windows picture directory and add the icon and start directory to your WT config:
{
        "guid": "{55ca431a-3a87-5fb3-83cd-11ecedd031d2}",
        "hidden": false,
        "icon": "file:///c:/users/<windows user>/pictures/icons/kali-menu.png",
        "name": "Win-KeX",
        "commandline": "wsl -d kali-linux kex --esm --wtstart -s",
        "startingDirectory" : "//wsl$/kali-linux/home/<kali user>"
},

Help
For more information, ask for help via:
kex --help
or consult the manpage via:
man kex

or join us in the Kali Forums
Enjoy Win-KeX!
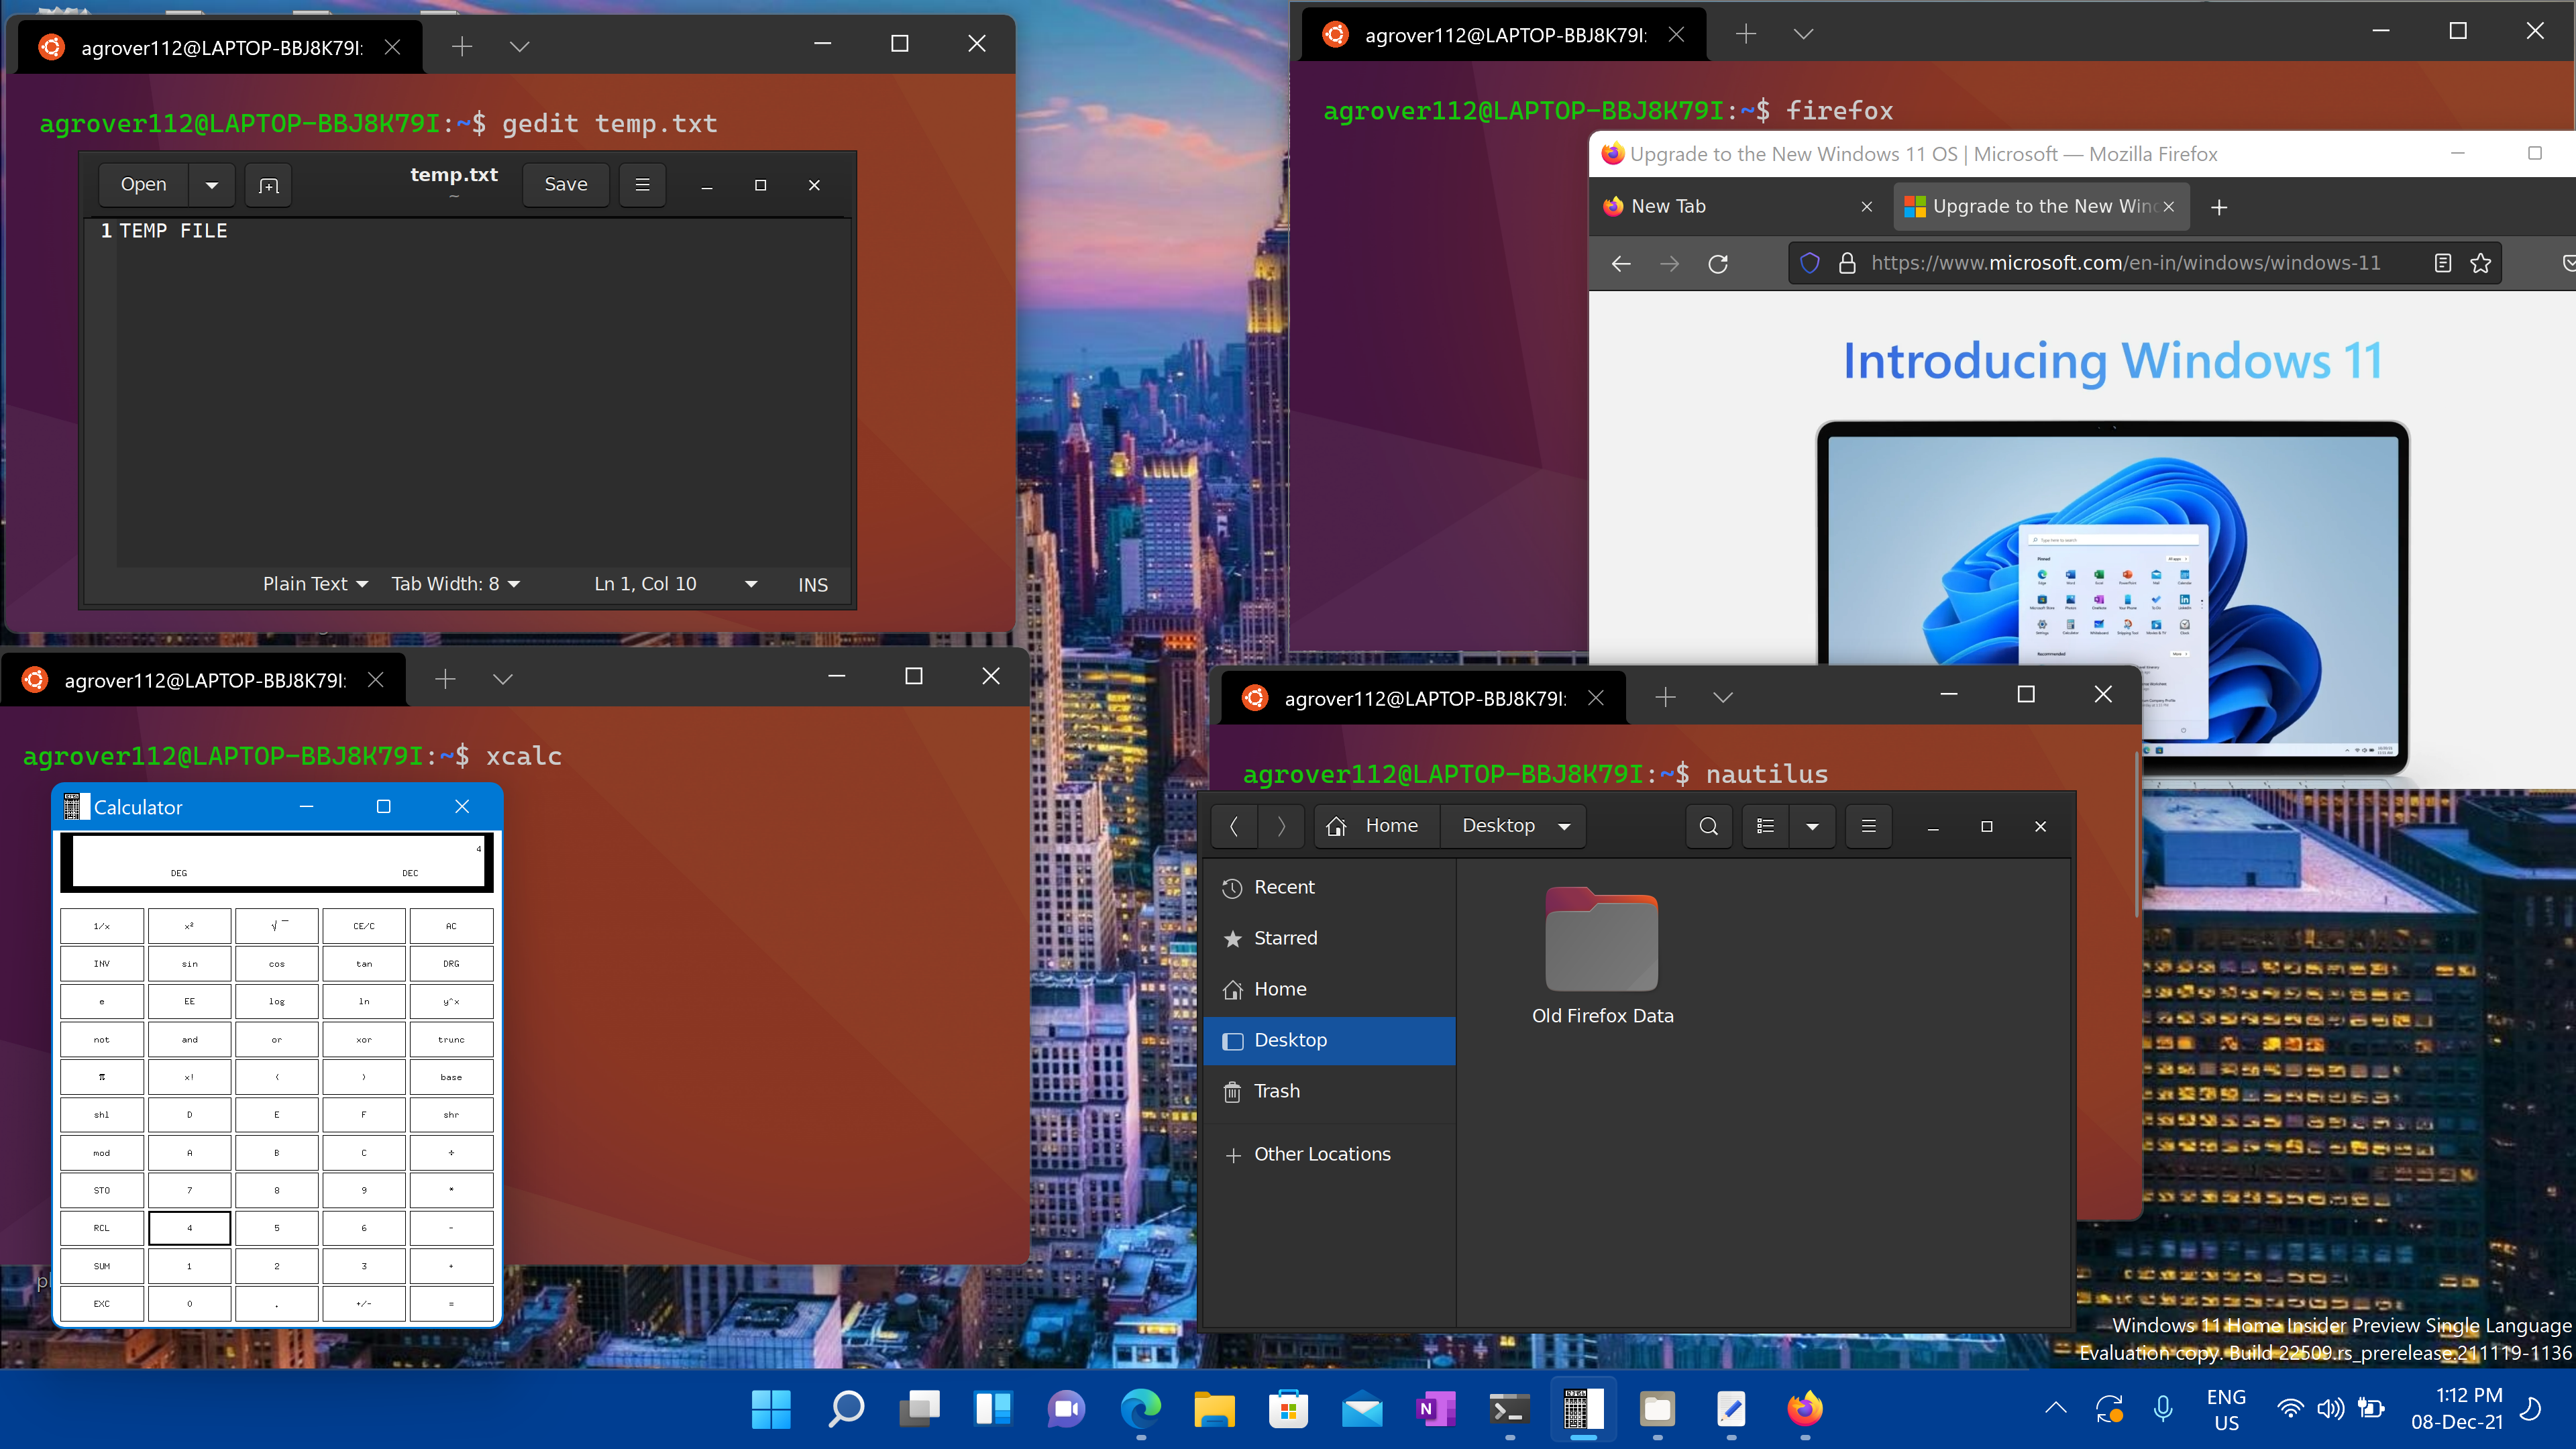
You can now preview Windows Subsystem for Linux (WSL) support for running Linux GUI applications (X11 and Wayland) on Windows in a fully integrated desktop experience.
WSL 2 enables Linux GUI applications to feel native and natural to use on Windows.
- Launch Linux apps from the Windows Start menu
- Pin Linux apps to the Windows task bar
- Use alt-tab to switch between Linux and Windows apps
- Cut + Paste across Windows and Linux apps
You can now integrate both Windows and Linux applications into your workflow for a seamless desktop experience.
Install support for Linux GUI apps
Prerequisites
You will need to be on Windows 11 Build 22000 or higher to access this feature. You can join the Windows Insiders Program to get the latest preview builds.
Installed driver for vGPU
To run Linux GUI apps, you should first install the preview driver matching your system below. This will enable you to use a virtual GPU (vGPU) so you can benefit from hardware accelerated OpenGL rendering.
Fresh install - No prior WSL installation
If you have not already done so, install WSL and set up a user name and password for your Linux distribution.
Open a command prompt with administrator privileges.
Select Start, type PowerShell, right-click Windows PowerShell, and then select Run as administrator.
Run this command and reboot your machine when prompted:
PowerShellwsl --install -d UbuntuOnce your machine has finished rebooting, installation will continue and you will be asked to enter a username and password. This will be your Linux credential for the Ubuntu distribution.
You're now ready to begin using Linux GUI apps on WSL!
Existing WSL install
If you already have WSL installed on your machine, you can update to the latest version that includes Linux GUI support by running the update command from an elevated command prompt.
Select Start, type PowerShell, right-click Windows PowerShell, and then select Run as administrator.
Enter the WSL update command:
PowerShellwsl --updateYou will need to restart WSL for the update to take effect. You can restart WSL by running the shutdown command in PowerShell.
PowerShellwsl --shutdown
Note
Linux GUI apps are only supported with WSL 2 and will not work with a Linux distribution configured for WSL 1. Read about how to change your distribution from WSL 1 to WSL 2.
Run Linux GUI apps
You can run the following commands from your Linux terminal to download and install these popular Linux applications. If you are using a different distribution than Ubuntu, it may use a different package manager than apt. Once the Linux application is installed, you can find it in your Start menu under the distribution name. For example: Ubuntu -> Microsoft Edge.
Note
Support for GUI apps on WSL does not provide a full desktop experience. It relies on Windows desktop, so installing desktop-focused tools or apps may not be supported. To request additional support, you can file an issue in the WSLg repo on GitHub.
Update the packages in your distribution
sudo apt update
Install Gedit
Gedit is the default text editor of the GNOME desktop environment.
sudo apt install gedit -y
To launch your bashrc file in the editor, enter: gedit ~/.bashrc
Install GIMP
GIMP is a free and open-source raster graphics editor used for image manipulation and image editing, free-form drawing, transcoding between different image file formats, and more specialized tasks.
sudo apt install gimp -y
To launch, enter: gimp
Install Nautilus
Nautilus, also known as GNOME Files, is the file manager for the GNOME desktop. (Similar to Windows File Explorer).
sudo apt install nautilus -y
To launch, enter: nautilus
Install VLC
VLC is a free and open source cross-platform multimedia player and framework that plays most multimedia files.
sudo apt install vlc -y
To launch, enter: vlc
Install X11 apps
X11 is the Linux windowing system and this is a miscellaneous collection of apps and tools that ship with it, such as the xclock, xcalc calculator, xclipboard for cut and paste, xev for event testing, etc. See the x.org docs for more info.
sudo apt install x11-apps -y
To launch, enter the name of the tool you would like to use. For example:
xcalc,xclock,xeyes
Install Google Chrome for Linux
To install the Google Chrome for Linux:
- Change directories into the temp folder:
cd /tmp - Use wget to download it:
sudo wget https://dl.google.com/linux/direct/google-chrome-stable_current_amd64.deb - Get the current stable version:
sudo dpkg -i google-chrome-stable_current_amd64.deb - Fix the package:
sudo apt install --fix-broken -y - Configure the package:
sudo dpkg -i google-chrome-stable_current_amd64.deb
To launch, enter: google-chrome
Install Microsoft Teams for Linux
To install Microsoft Teams for Linux:
- Change directories into the temp folder:
cd /tmp - Use curl to download the package:
sudo curl -L -o "./teams.deb" "https://teams.microsoft.com/downloads/desktopurl?env=production&plat=linux&arch=x64&download=true&linuxArchiveType=deb" - Use apt to install it:
sudo apt install ./teams.deb -y
To launch, enter: teams
Install Microsoft Edge browser for Linux
Find information on how to install the Microsoft Edge browser for Linux using the command line on the Edge Insider site. Select Get instructions under the Command line installation section of the page.
To launch, enter: microsoft-edge

Comments
Post a Comment